Pages

Saturday, May 31, 2014

How I do My Daily Cleansing

Hai Everyone~ I'm back with my new post! XD

In this post, I wanna share my cleansing tips and my cleansing routine which I think very very important for all of us who loves makeup. After wearing makeup for all day long, you want your beautiful skin to have a "relax time", don't you? ^^ Clean skin is the first step to have your skin flawless~
At first I got worried to reveal my "duck face" without my makeup ==" but that's oke. I wanna share my beauty spirit with you guys, more than I care about my duck face haha XP

OK! Then, follow me to see my cleansing routine~~

The duck is here =="

1. Dry Cleansing First

Cleansing Oil

Dry cleansing is really important. Before I go into a water cleansing, I use cleansing oil to remove all of my makeup. For those who are not really using makeup, It's fine for you to skip this step. But for those who really loves to use face makeup (read: me), this step is a must! Cleansing foam is not enough to remove all of your makeup. Especially if you love to have a heavy face makeup, Cleansing Oil is a recommended item. Cleansing with oil doesn't mean adding oil to your skin. For oily skin type, don't worry your face will become too oily, you just need to find cleansing oil for oily skin and it will have a fresh result for your skin along with the perfect cleansing. If you wear a light face makeup, cleansing water or cleansing lotion can be your choice. 

Don't put any water to your face. 
Pump the cleansing oil, softly massage it to your skin and rinse it with water  ^^ 

2. Instead of water, Green tea. 


To perfectly clean my face, I use green tea water instead of water. Green tea contains a lots of beneficial ingredients to maintain our skin health. It gives a soothing and relaxing effects to your skin (my skin easily become red often T__T). Besides green tea helps you to remove the remaining waste that water doesn't. As result, you get a cleaner cleansing. And the antioxidant in green tea protects your skin from pollution, sun light, dust, etc.  And everytime you wash your face, You'll get the nice smell.Bravo Green tea >O<
After washing, don't just rub your face with towel but slightly pat the green tea water to your face, make it absorb. ^^
 

3. Foam Foam My Face


It's time to have the water cleansing. I use Cleansing foam for my daily cleansing. And the important part here is to wash your face with the foam. Once I have ever read a beauty tips from a magazine, It is said that letting your cleansing foam cream directly touch your skin is a big NO NO~  You have to make the foam first and wash your face with the foam It makes.

So~~ I have my little foam maker bubble here ^^. With this you can make a lot of foam for your cleansing.


Clean your face with the foam. Make round moves to massage your face
 

4. Pore Cleaning

Pore Brush

I use pore brush to clean my pores about 2 or 3 times a week. With this brush you will have your pores clean and getting smaller. It removes excessive oil in my face. For those who have trouble with oily skin, blackhead or pores, you can use this brush everyday for your daily cleansing. But for dry to normal skin it is not recommended to use it everyday since it will make your skin dryer and loose its moist.

Role it at your face with your foam

For nose or around lips you can use the smaller one ^^

5. Get the Perfect Clean Skin

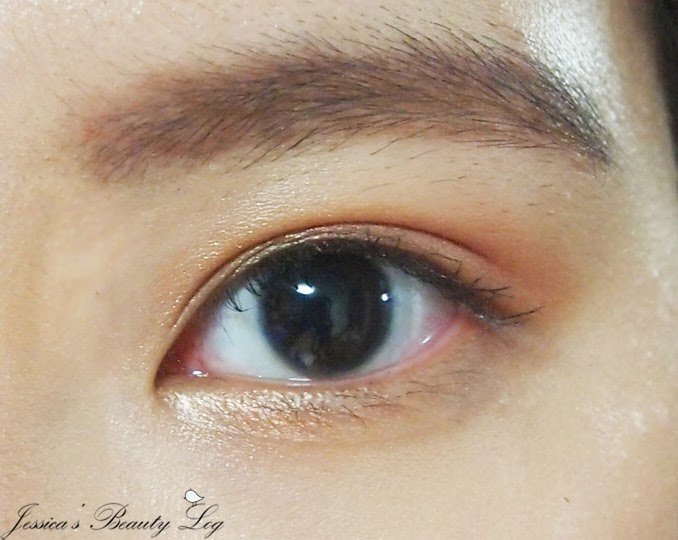
Rinse your face and Voilllaaaa you got the "It Skin" XD


After a perfect cleansing your face will able to take the full benefits from your skincare ^^

That's my cleansing routine! >O< Hope this post can help you with you cleansing routine  too~

Thanks for reading, see you!
~~XOXO~~

Wednesday, May 28, 2014

REVIEW: Benefit Feelin' Cheeky!

Hi Hi Everyone~~ >O<
I'm back with my new Review post today. That is~~~~

Benefit Feelin' Cheeky

Since Benefit is really famous for its tint collection (like all beauty lovers use it), I really wanted to try Bene tint. But the price is not really friendly for me T__T. One day I saw online that Benefit launch its new minis kit and I got excited!!! Finally I got the chance to try the famous rose tint in a friendlier price.


Feelin' Cheeky Kit

Let's take a look on the inside! 


My minis. So cute, isn't it? ^O^


Compared to credit card size 

 It consists of Posie Tint (pink tint), High Beam (highlighter) and Bene tint (red tint), 4ml for each. You can get this cute minies in Sephora for $15. Actually at first I just wanted to try Bene tint but I saw this minis and Waaaaaw nothing wrong to try the three of them at once. No doubt, I order it!! Haha

I bought it at Lotte Online Shopping Mall in Korea. And they kind of had a promotion for this Feelin' Cheeky Kit. Every purchase of this products will get a freebies which is...

Benefit Lolli Tint 2.5 ml


 Lolli tint, the purple tint

How to use it

Yap Yap Yap I'm so happy to have it >O<. Among 4 Benefit tints, I have 3 of it and now the Cha Cha tint remains (wait for me! Hihi). 


Ok~ It's time to use these minis. Here I go!!


This tints really have a soft colors. The texture is like water and right after you apply it on your lips, you won't get the feeling like you are using lip color on your lips. And the result, It's like you have that lip color from the start. So natural. And also I saw many people use the tint for blusher also but I won't do that (too precious for me haha)

For daily use this tint is really really good. It gives you a very natural look. But If you want others to notice your beautiful lip makeup more, I don't think this tint is the choice. Even if you apply it more, the color is still too soft. And It's not really good to moisturize your lips. Some people like to have moisturizing lip colors to prevent the lips from cracking and ruin your lip Makeup. This tint is really like water and I didn't feel It moisturized my lips T_T

Next is the High Beam Highlighter.

Wow Wow this is nice~

I love this minis! It's really cute and pretty. I prefer to have minies kit like this one rather than buy the real size one. Besides It is ,of course, more expensive, you actually need a long long time to use all one lip product (Bet you have plenty of lip products XP). So minis is the right choice. You got the stuffs in a cheaper price and you can try on some the other stuffs at once. ^^


Thank you for reading. See you in the net post

~~XOXO~~


Monday, May 26, 2014

REVIEW: Banila Co Let Me Touched Glow BB Cream

Hi~~ I'm Jessica ^^
Recently I started to have my new love for Korean makeup brand. It's Banila Co.  Banila Co It's a little bit different with the other road shop cosmetics like Etude House, Faceshop or Skinfood. Hmmm I should say, maybe I step above them? (at first you only can find it inside department store). It's more expensive than usual road shop but It really has a good quality products. In this post I wanna give my review for Banila Co Let Me Touched Glow BB Cream

I love Glowy makeup. So I cannot stand to see a Glowy face product, and this Banila Co Let Me Touched Glow BB cream is one of them >O<


Banila Co Let Me Touched BB Cream

This BB cream is designed to make a glow face makeup with medium to high coverage. 
It is 35ml and 30.000w (about $30).
Quite a price but in G-Market Korea sometimes they have discount price for Banila Co and i have this one by 50% off *lucky me*

This BB cream has no big range of colors option . It comes in 2 colors which is Classic Beige and True Beige. And I got the first color (lighter one); Classic Beige.


Compared to the other face Makeup that I have, this BB cream has a lighter color. Korea usually has 13 (Ivory), 21(Light Beige) or 23(Natural Beige) for their face makeup colors. I thought that the Classic Beige one maybe has about the same color with number 21 but I actually slightly lighter that the usual no.21. At first, I was a little bit surprised. It makes my skin a "really really" fair complexion look. But as I used it for times to times, I'm used to with the colors, and start to think maybe my skin tone is actually match the lighter color but i'm just afraid to try it.>O<  It has Pink under tone color.  I'm actually a yellow under tone but it still fits my skin. Not like I'm wearing a mask just gives my face a "cool" look rather than "warm" look. 

It comes with tube type, light case, comfortable to be carried every where. 

It's back

On the back, It's explanation in Korean. It said this BB cream has 3 functions; Whitening, Sun Protection, and Anti Wrinkle. This BB cream helps moisturize your skin and make healthy glowing skin with natural coverage. 

So let's test this BB cream!

Glow Test

Yap, this BB cream gives your face a glowing result for sure not just an empty words at the box. Do you see the Glow?? ^^ You can see the right part of my hand with Let Me Touched BB cream.


When I used it to my skin

When I applied it to my face, It's not too glowing like I have an oily face but slightly, give us the natural Glow Look >O<. I love the Glowing skin it gives!! If you want to get more glow results you can mix the BB cream with face oil, volumer or shimmering base ^^

The Next part is coverage test

Ohooooo~~ the coverage is good. Usually Glowing BB cream doesn't have a good coverage because it has to be very light with thinner texture (more like water than cream) to maintain the glow. But this BB cream really has a good coverage among its glow BB friends. At first I was also amazed by it~ ><

My skin is not oily type. I used this BB cream for about 8-10 hours everyday and still no touched-up was needed (just the glow become more than the first, but i love it). I think even for those who have oily skin this BB will still fit you.

So, What I like about this BB:
It really gives Healthy Glowing skin
Good coverage for such a glow BB
Long wear usage
I personally like the smell

What you should consider more for it about:
The Pink undertone; Cool tone.
Quite high price for BB cream
Lighter than usual Light Beige color


Overall~~ I love this BB cream (since I really to dewy face Makeup) and I'm recently using this BB cream for my everyday look XP

Thank for reading my review. See you in the next post >O<
~~XOXO~~


Wednesday, May 21, 2014

Today's Makeup: Graduation Photo Shoot

Hello everyone~~ >O<
Today is a special for me. It's My Graduation Photo Shoot Day!!! ^^
After almost 4 years in University, I will be graduated and today is the day to fill in my University memories in an album. So excited!! 

Since today is an important day, of course I want to show up perfect and beautiful Hihi~ For today, I left my natural and cute makeup and went to a GORGEOUS SMOKEY GOLD MAKEUP  and the result is......

TAARRRAAAAA

>O<

I Choose Yellow Gold color Smokey Makeup for my today to match it with my dress and gold necklace. ^^

Lovely babes that helped me today. L to R: 
Aritaum Eyelashes no. 2 Petit Volume
Maybelline Water Shine Pure lipstick C11 coral
Tony Moly Backstage Liner 01 Black
Innisfree Mineral Single Shadow 19
Too Cool for School Cream Shadow Peach
Innisfree Mineral Shadow no.9 (the yellow one)
Missha Sheer Fluid Blusher 1 Aura Pink

Thanks to them today I can make my day more special for Graduation Photo Shoot >O<

So, Let's take look closer on my Today's Makeup


I used Yellow Gold color from Innisfree as basic shadow color and under eye shadow. Then slightly used brown peach shadow color from Too Cool for School at my lids, made it peeking out a little when i open my eyes.As the Point Color, I Used Dark Green Brown color from Innisfree. After that, I rounded all my eye with black gel eyeliner from Tony Moly. To have a more dramatic eye makeup effect, False Lashes will never die. >< 

Voillaaaaa It's Done!!

For blusher, since I already had a heavy eye makeup, I choosed light color for my cheek just to create a fresh look face~~
The product name color is pink aura but actually it has pink coral color

Also Shine Coral Color for the lips. Rather than Matte Lipstick, I took shine watery lipstick with me. It can balance my look not to look too heavy.
 Water Water Shine~~

Yaaaayyyy~ I'm Ready for my Photo Shoot

I had an outdoor shoot that allowed me to use free costums and also a studio shoot which i have to use the scholar gown and cap XP. All the pictures for the outdoor shoot is with the photographer (I don't have one) T__T. But I took some opportunities to take picture with the "Legend Gown and Cap" haha

 Sorry the quality is not really good =="

Finally the Photo Shoot was done!! I'm really looking forward to see the result in my graduation album >O< Hope the result is as good as I hope T__T

I didn't wanna waste my beautiful makeup erased right after the shoot was end. A Coffe Date with friend would be a good choice to have a relax time >< 


Hope you enjoy my new post, See you on the next one. Bye bye!

~XOXO~


Sunday, May 18, 2014

REVIEW: Dream Girl False Lashes

Hi Hi Everyone!! ^O^

My lashes are quite short and need more volume T__T, so I love to use false lashes for makeup. Today I want to review my favorite false lashes at the moment.  
~Dream Girl False Lashes~

Love Love This lashes ><


Dream Girl False Lashes

This is my first try for Japanese false lashes. Last summer vacation I went back to Indonesia and Woow I found this pretty lashes. For those who are live in Indonesia, you can find this lashes at Guardian drug store. 

This is the brand and its front. I have no idea about Japanese at all haha

It's brown and black for natural color

The back. Again all Japanese, have no idea

I bought this Rp. 175.000 or about $16. We can see at the back, the actual price in Japan is 1.029Y. Not cheap, but still in good price for good quality Japanese false lashes and don't forget we got 5 pairs for it. This lashes are synthetic, but still soft and will not irritate your eyes. I actually prefer the synthetic one than the real hair. Sometimes the real hair one is to soft and the result is too soft to be seen T__T. The synthetic one is more dramatic. This Lashes is overall really really good but one thing, It has no glue inside ㅡㅡ" So you have buy it separately or use the other lashes' glue.

So~~ Let's try this lashes


My Eyes with brown eye shadow 

Before applying the lashes, I curled my lashes first and had mascara on it. Many people likes to apply false lashes first, curl it and use mascara to the false lashes to make the false and real lashes be one and natural. But I don't really like that since it will dirty the false lashes and make it broken easier plus faster. And i find it a little bit bothersome to clean the lashes every time I use it. So I curl and mascara my lash first then applying the false one. Just make sure your lashes curled perfectly then it won't seem like you have two parts of eyelashes. I found no really big difference to have mascara before, still pretty ><


After eyeliner to hide the line

One thing I really love about Japanese false lashes, It makes your eyes seem rounder. The moment I use Japanese False Lashes, my eyes turn like Japanese eyes >o< ~Kawaii~

No doubt will buy the other type if I found it

This false lashes is natural type, not too much even for daily use. Maybe it seems long and too much but NOT. It's natural and yet has a dramatic result for your eye makeup. 

That's my review for this Dream Girl False Lashes. My savior for 
pretty daily eye makeup >O< 

Today's makeup Natural

Thank you and see you next post.. XOXO..
 
Blog Template by Delicious Design Studio